Trace Bearing Damage to Inspection and Adjustment Conditions
- Identify bearing damage that requires matched cone-and-cup replacement.
- Trace repeat failures to lubrication, contamination, or cup seating.
- Distinguish bearing adjustment faults from surface damage.
- Shop jack and rated support stands — Support the trailer according to its manufacturer's instructions before wheel-end service.
- Parts-cleaning brush and solvent tray — Remove old grease with suitable solvent so bearing surfaces and cavities can be inspected.
- Clean, lint-free cloth — Dry the cleaned cone without leaving fibers on its surfaces.
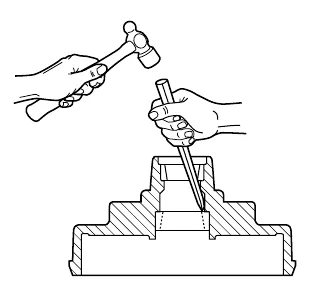
- Bearing cup driver — Install the replacement cup fully against the clean hub retaining shoulder.
- Torque wrench and suitable socket — Apply the installed arrangement's specified locknut torque using the manufacturer's procedure.
- Dial indicator and mounting base — Verify final bearing end play using the installed arrangement's measurement procedure.
Clean the bearing cone with a suitable solvent and dry it with a clean, lint-free cloth before inspecting every roller. Pitting, spalling, or corrosion requires replacement, and the cup inside the hub must also be inspected. Replace a cone and cup as a set.
Bearing condition depends on both lubrication and cleanliness. Remove old grease before repacking, and do not mix incompatible grease types. Metal chips from drum turning or armature refacing can cause premature bearing failure if they remain in the bearing cavities.
A replacement cup must seat fully against the hub's retaining shoulder. A new bearing does not remove the need to clean the bore and inspect the assembly during installation.
Adjustment is another distinct failure path. In the covered double-nut arrangement, failure to back off the inner adjusting nut can cause overheating and spindle damage, while improper outer-locknut torque can allow wheel-end separation. Dexter specifies 0.001-0.010 inch allowable end play for this arrangement; values vary by maker and bearing design.
How It Works
Read the cleaned surfaces
Grease can conceal damaged bearing surfaces, so clean the cone with suitable solvent, dry it with a clean, lint-free cloth, and inspect every roller and the cup. Pitting, spalling, or corrosion requires replacement of the cone and cup as a matched set. Damaged rolling surfaces interrupt smooth load transfer and can shed particles that accelerate further wear.
Remove the conditions that caused failure
Lubricant separates loaded surfaces, while contamination can disrupt that protection and damage the rolling contact. Remove old grease before repacking, avoid incompatible grease mixtures, and clear machining chips from bearing cavities. Clean the bore and verify that the replacement cup seats fully against the retaining shoulder; new parts cannot compensate for debris or incomplete seating.
Adjustment is a separate failure path
In the covered double-nut arrangement, failing to back off the inner adjusting nut can leave seating preload that causes overheating and spindle damage, while improper outer-locknut torque can allow wheel-end separation. Dexter specifies allowable end play of 0.001-0.010 inch for this arrangement, but values vary by maker and bearing design. Follow the exact installed arrangement's adjustment and retention procedure rather than treating an acceptable end-play reading as proof that the locknut is secure.
Step-by-Step Procedure
0/7 doneDexter covered double-nut wheel-end check; values vary by maker and design
| Allowable bearing end play | 0.001-0.010 inch |
Figures
Diagnostic Chart
| Symptom | Check | Spec / Expected | Likely cause & fix |
|---|---|---|---|
| Pitting, spalling, or corrosion is visible after cleaning. | Inspect every roller and the cup inside the hub after removing lubricant and drying the cone with a clean, lint-free cloth. | Replace defective bearings as matched cone-and-cup sets. | The rolling surfaces are defective; replacing only the visibly damaged component leaves its mating surface in service. Basis: 9-15k complete service manual |
| Bearing failure repeats after repacking or nearby machining work. | Inspect bearing cavities for metal chips and residual grease; verify that the repacking lubricant is specified and compatible. | Remove old grease before repacking, do not mix incompatible grease types, and remove machining chips from bearing cavities. | Retained machining debris or unsuitable lubrication conditions can cause premature failure despite bearing replacement. Basis: 9-15k complete service manual |
| A replacement cup is not fully seated. | Inspect bore cleanliness and verify full cup seating against the hub retaining shoulder. | The replacement cup must seat fully against the retaining shoulder. | Debris or incomplete installation can prevent correct cup seating; a new bearing does not eliminate the need for installation inspection. Basis: 9-15k complete service manual |
| The serviced wheel end overheats or shows excessive looseness. | Identify the installed arrangement, review inner-nut backoff and outer-locknut torque and retention, and verify final end play. | Dexter covered double-nut arrangement: 0.001-0.010 inch allowable end play; use the exact maker and bearing-design procedure. | Failure to back off the inner adjusting nut can cause overheating and spindle damage; improper outer-locknut torque can permit wheel-end separation. Basis: 9-15k complete service manual |
At the Bay: Diagnose the Case
CASE 1 / 4
Pitting, spalling, or corrosion is visible after cleaning.
- Test
- Compare
- Correct
Select the next check
Basis: 9-15k complete service manual. A likely cause is a hypothesis; confirm it with the applicable service procedure before repair.
Common Bay Mistakes
- ✕ Inspecting through grease instead of exposing every roller.
- ✕ Replacing the cone while leaving a damaged cup in service.
- ✕ Repacking over old grease or machining debris.
- ✕ Applying the covered Dexter end-play range to every bearing design.
Quick Check
Practice only — not scored.
Plan the Service Sequence
Planning practice only. Follow the applicable manufacturer's instructions, employer safety program and qualified supervision on real equipment.
Plan the first action. Compare the service steps with the bay mistakes.
Source: 9-15k complete service manual — 56-64